Saturday, 23 February 2013

About manjaris (flowers & seeds) Tulsi produces


Just to write a few words about manjaris (flowers).

Tulsi tends to give manjaris during summer hot season and at this moment in Australia she is profusely providing them. It is a way to give us plenty seeds to continue growing her and sharing her presence with our friends.

Although she is beautiful with them you need to bear in mind the production of seeds diminishes her life energy. My mentor always says 'if you let her produce seeds she will produce less leaves' and the greener she is the healthier she is.

As simple as that.

So, you will need to remove all excess manjaris and offer them to Krishna.

The whole of last season I've allowed only about four strongest manjaris to go into seeds and when the seeds turned brown I've used one of those transparent zip lock small sandwich bags to cover them, so they wont fall off if you accidentally shake the manjari. I've then left them there until they dried out making the seeds of good quality.

The reason for this bag is that the seed that falls off from manjari grows into small Tulsi withing the pot of mother Tulsi and this will mean you need to damage their roots to transplant them. Mother will surely survive but baby might struggle so I prefer that not to happen.

If you don't have a mini zip lock bag u can use bigger one by cutting it with scissors and making a small one using clear tape. Try to leave a small hole in one of the corners to keep the air coming to seeds. I didn't have time to do it this year and I still have seeds from last season but I'll try to do this in next few weeks and produce some pictures to give you an idea of what I was doing.

As you will see each manjari produces almost a hundred seeds if it is a big one as each manjari is made of maybe twenty or more mini flowers each having four seeds inside.

I gave some seeds to our friends and they all got Tulsi plants growing out of them.

The famous Tulsi that has the pictures in 'Growing Tulsi step by step' series on this blog is one of them.

So, even if you don't do 'the baging of seeds' thing just take care to remove all but one of two most beautiful manjaris in a season and your Tulsi is going to be growing greener and healthier.

Manjaris to be cut and offered


Fully grown manjari

Where to cut (under the first set of leaves)


 If you look at the picture on the left and one below you will see two mini manjaris growing just above the two top leaves. This is the reason we have to cut manjari under the two top leaves or better to say with the two top leaves.


Fully grown Tulsi gives a lot of manjaris


Manjaris ready for offer. When we have this much I usually share them with friends who have Deities at home for their offers and Tulsi appreciates and provides more and more ;)


Happy Tulsi, happy home!

20130223 - third cutting - Tulsi growing step by step

Haribol,

Here she is, our beautiful and most auspicious guest.

She is growing fast as it is summer time in Australia and conditions couldn't be any better. It's sunny, warm, humid, she is close to window and we keep the window open so she has plenty of fresh air.

Since I was removing the manjaris from her mother I also tipped off our baby Tulsi as she has been ready for this even last week but I didn't manage to do it.

It is important to keep in mind when you cut tips, manjaris or leaves to do it before noon. This gives her time to recover during day and it is recommended in scriptures.

As you can see in pictures she now has four tips to cut. From two leaves below each cutting we make she produces two new stems and next time you will cut twice as many tips. So first time we have cut one tip, second time two tips and third time we have for tips to cut. Next time it will be eight and so on ;)

Also, this gentle way of helping her to spread the twigs wider is the reason you need to be careful not to damage the leaves under the cut. If you do so by for example, being impatient and trying to cut the tip when she doesn't yet have enough length for you to safely do it, she will not produce the new stem from damaged bud at the the top end of leave stem so please be careful.

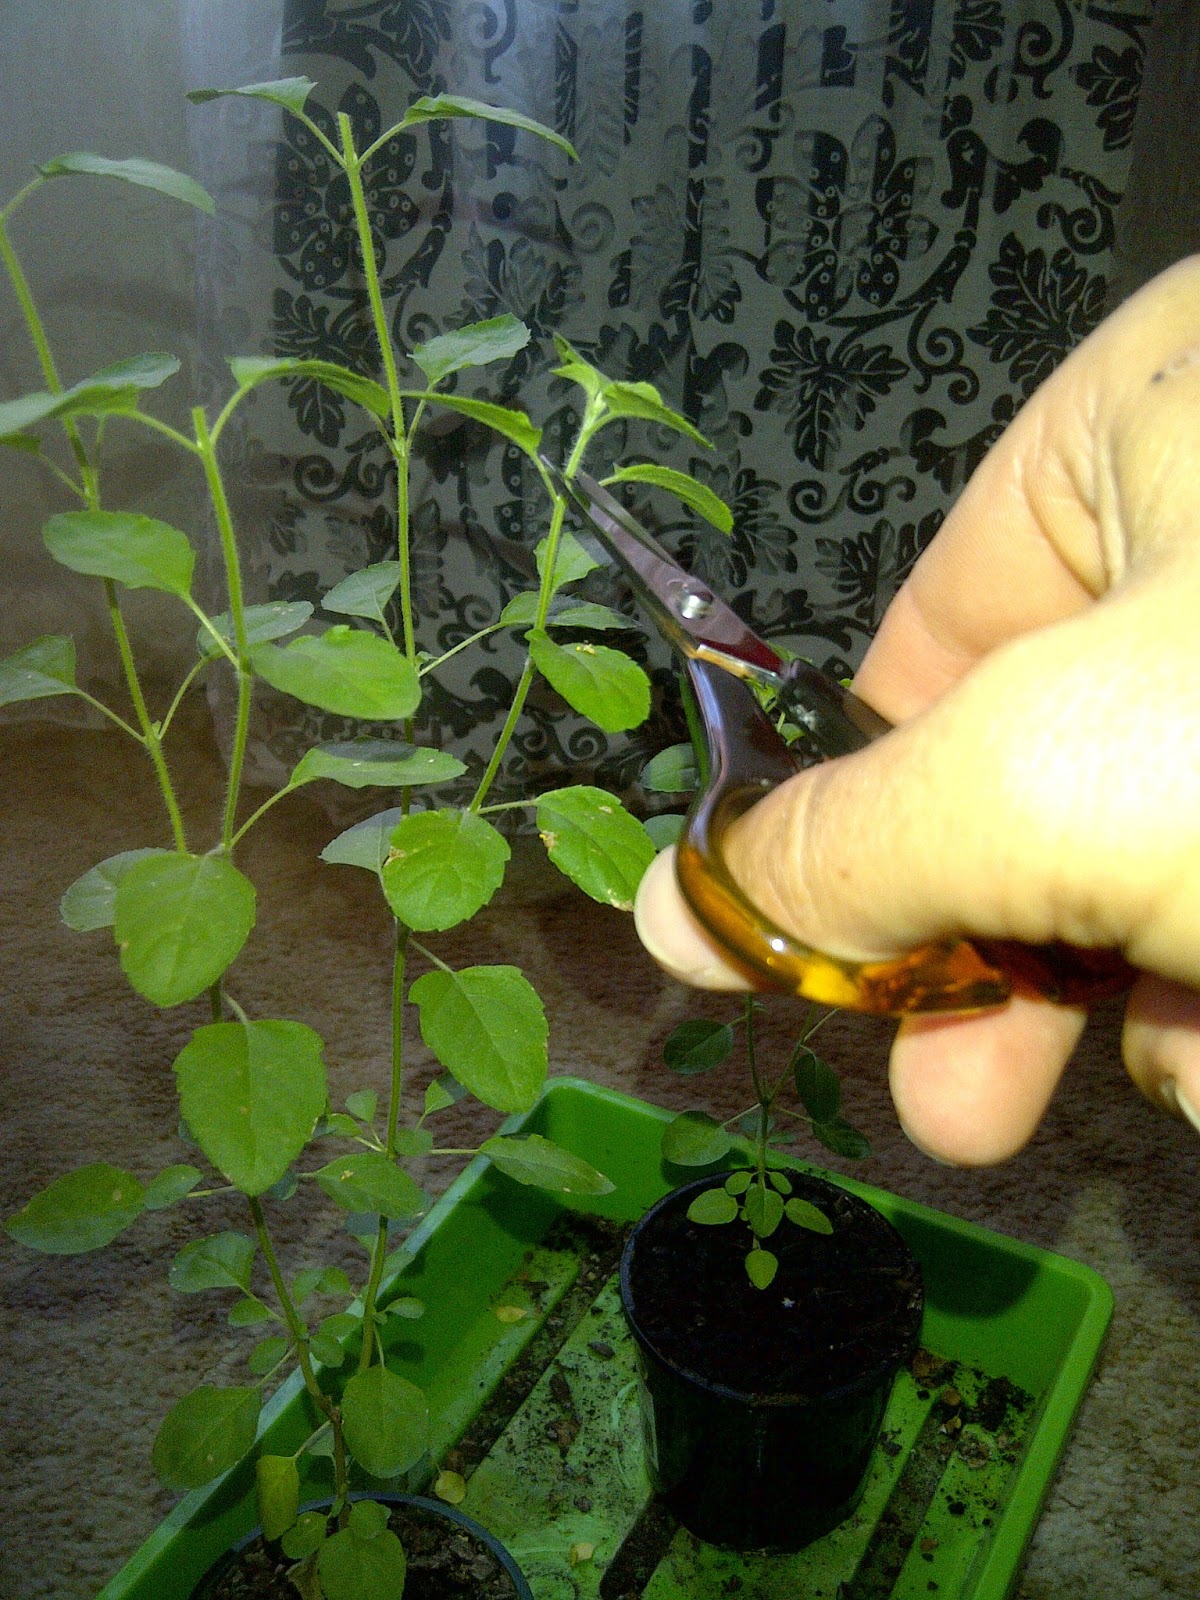
First tip coming off

As you can see, I'm following that simple rule I've been writing about several times. Three sets of leaves and you then cut the rest above.

Don't cut too close to leaves because of previously mentioned reason. Cut about 5 mm above leaves.

As you can see from the rip above I should have cut these last week but didn't have time to do it so I've done it today. The tips are still very young and it doesn't hurt her more than it should last week as you can see the stem is young, green and soft.

Caring for Tulsi requires a bit of logic, following your heart and just regular care for her.


Second tip coming off


Third tip coming off


 Same thing, count one, two, three (pairs of leaves on stem) and cut above.


Fourth tip coming off


That's it for this report.


Take care of your Tulsi and she will take care of you ;)


Saturday, 12 January 2013

20130112 - 4 months later - Second cutting - Tulsi growing step by step

Hare Krishna,

Its now been four months and since the first cutting Tulsi has grown enough to make the second cutting.


As you can see from the point of last cutoff she has grown two stems that now have 3 fully grown pairs of leaves and another two just starting to grow.


This is the perfect time for cutting again. With cutting the rule is as follows 1, 2, 3 cut off. You always cut above three fully grown pairs of leaves.

If you didn't have time to cut her and she grows so fast that it has done 5 fully grown sets then cut after the fourth. You have to be sensible and not give her too much pain.

So here it is, on the right you can see I'm holding the third set of leaves above which I will cut the tip and offer it to Krsna.


About to cut it now.


Here she is. The tops are cut off and she will from this point make another branch out.

If you wander why is the rule 1, 2, 3 cut off it's simple.

If you look at the way pairs of leaves grow you will notice that each pair of leaves grows vertical from the previous pair (90 degrees difference).

Making next cut after the 3rd pair will make branch to spread vertically to the previous cut making Tulsi spreading her branches in beautiful symmetrical pattern.

Please note how her stem between the leaves is not perfectly straight. It is because I'm turning her around every day because in house she has light only from the window and at the end of the day her tops are always turned towards window.

If you forget to turn her she will grow only to one side and will be hard to straighten her after some time.

You can fix this only by transplanting her to new pot with adjustment of the soil to make her grow straight again.


Happy Tulsi growing!
 

20121209 - 3 months later - First transplanting - Tulsi growing step by step

Few weeks before first cutting I've notices our Tulsi has lost first few leaves from the bottom and I was wandering why.

I think I found the reason when I replenished some of the soil on top of our fully grown Tulsi with seeding mix soil.

What happened is that she suddenly stopped diving shoots, many leaves changed color into yellowish and started falling off.

I was thinking could I have over-watered her but it suddenly dawned on my that was the only thing out of the ordinary.

The seeding mix must have too much fertilizers in it and it just burned her same like it happens to us if we have too much chillies and don't take yogurt drink after.

She recovered after few weeks but that occurrence gave me the idea it might be the same thing happening to small Tulsis.

To test this I have transplanted two of Tulsi's and left one in the same soil I've planted her.

After about a month I noticed that Tulsi's that are transplanted grow faster than the one left in the seeding mix (couple of centimeters taller) so I've transplanted her today and she will soon catch up with the others.


Here are the pictures of the transplanting process:

Water the Tulsi the evening before or at least couple of hours before transplanting.


Gently turn her upside down holding her body between your fingers not to let her fall down and get her injured.


Let the soil gently crumble away from her roots. Do not force it. the soil attached to her roots should not be moved and her roots should not be damaged. If you gently roll the soil in your hand always holding the stem of her body the excess soil will fall away.


When you finish only the last little bit of soil around the roots should be left and you then simply place her in the same pot adding fresh organic soil mix around her roots holding her at desired height in the pot.


At the end you need to water her to the point of run off and replenish some more soil to the top as the soil tends to fall in after watering.

When you finish she should be looking same as before but with fresh soil around her roots helping her grow stronger and greener.


Sri Tulsi Devi Ki Jaya!

20121209 - 3 months later - First cutting - Tulsi growing step by step

I have to apologize to all the Tulsi growers checking out this blog for not posting for some time.

Too many things happening in my life ;) (good things of course).

So lets get back to writing. Here it is, after about 3 months our Tulsi has grown so big we can make the first cutting and offering to Krsna.

As you can see before you make a first cutting Tulsi should have at least three fully developed pair of leaves.

Cut just above a pair of leaves being careful not to damage the new shoots coming just above the stem of leaves.

To cut the tip of new leaves you need sharp scissors. Best ones are the scissors used for embroidery found in most supermarkets in Australia for around $5.

These are best because they are really sharp and pointy so you can be precise in cutting and give her a least amount of pain possible.

When picking Tulasi leaves, chant the following mantra:
tulasy amrta janmasi
sada tvam kesava-priya
kesavartham cinomi tvam
varada bhava sobhane
"O Tulasi, you were born from nectar. You are always very dear to Lord Kesava. Now, in order to worship Lord Kesava, I am collecting your leaves and manjaris. Please bestow your benediction on me."

After you have finished you need to chant the following Mantra:
 cayanodbhava-duhkham ca
yad hrdi tava vartate
tat ksamasva jagan-matah
vrndi-devi namo 'stu te
"O Tulasi devi, I offer my respectful ofeisances unto you. Kindly forgive me if I have caused you pain my picking your leaves and manjaris, o mother of the universe."

Saturday, 13 October 2012

20121013 - One month later & What to do with Tulsi when you leave for holidays - Tulsi growing step by step

Here she is, our little beauty!

One month later and just before our five days trip.


Before leaving home we've watered her and her mother Tulsi well and left the blinds closed half way so they can get some light but not as much as usual.

This simple practice allows for water to be kept a bit longer and for them to be well without re-watering for a few days.

If the weather was warmer or we went away for longer we would made sure someone comes to water them or possibly give them to someone to care for them during our holidays.

You have to be careful when giving them to someone who has their own Tulsi or other plants at home as if they touch or be placed close to each other they could get mites transferred over.

That happened to me last Christmas break. It took me half a year to get rid of mealy bugs!

So be careful where you would give them to. I think the best practice would be to get someone to come over, water them every few days and turn them 1/3 of a circle around to prevent all shoots to be leaned towards the window.

Wednesday, 26 September 2012

Temperature

This is one of the important thing you have to consider when planning to grow Tulsi at home.

She originates from warm climate and can't stand cold temperatures, i.e. temperature below 15 degrees Celsius should be avoided by any means.

Over years I've tried few things to keep her warm, especially in our first year with her.

Our previous home was cold and I found it is easiest to keep a radiator in her room and adjust the temperature setting to around 18-20 degrees which is not too high to make you a hefty electricity bill and still makes her feel good over winter. You just need to play with the setting over few nights to make it right.

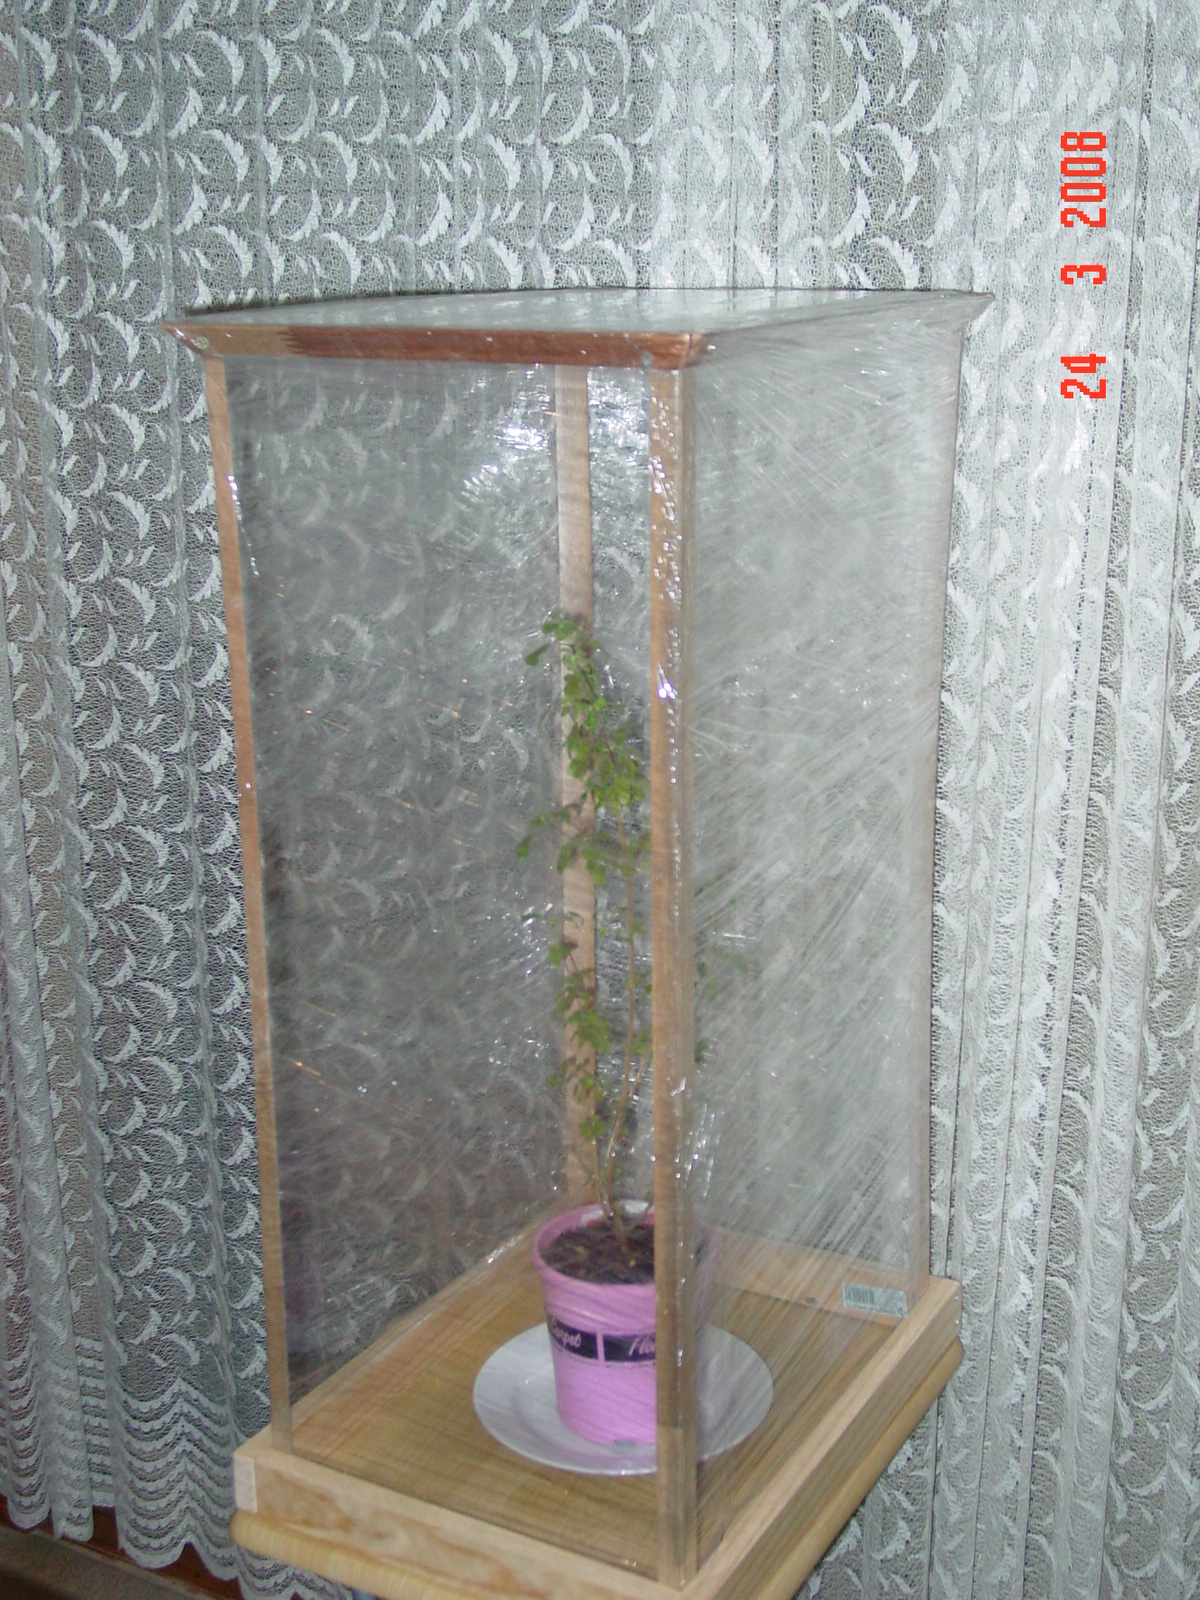
Here is one of my handy solutions I've tried one of the first few winters after she joined us.

This is just a simple box made of corner slate used in parquetry wrapped around with food wrap. It could be easily lifted on and off and had half a centimeter space bellow to get the air in/out.

This was keeping her warm for a month but then I realized nights are getting colder and started keeping her in a small room with a heater as a much better solution.

A simple way to check her temperature is to buy a small portable termometer ($2 shops are good source) and keep it on her table to check what is the temperature before you go to sleep and in the early morning when you wake up.

During some cold nights if I would have to put extra blanket I would make sure I check temperature in her room and increase heater setting if necessary.

This is not too complicated but requires your decision to spend some money on electricity or gas to make her happy and you will be rewarded by many blessings in your spiritual life.